Uploading to the etree collection (Live Music Archive)
2022-07-18
Please read the full Live Music Archive FAQ at https://help.archive.org/help/live-music-archive-etree-org/
Consider naming your files according to etree naming conventions. Most importantly, no spaces! Also, be sure to use two digits in your track numbers (i.e., 01 instead of 1.) See http://wiki.etree.org/index.php?page=NamingStandards
Before you upload your show, you should check the band's Rights section. Many bands on the LMA have restrictions on what fans can upload or who can upload. Some want only audience recordings uploaded and no soundboards. It is very important to check the policy first so that your show isn't later removed for violating policy.
Check the band's policy page at "Browse All Artist Collection Pages in the Live Music Archive". Then click the name of the band to see their collection page. The "Rights" field details any limitations the band has on uploads. Provided your show fits within the band's rights, you are ready to upload the show!
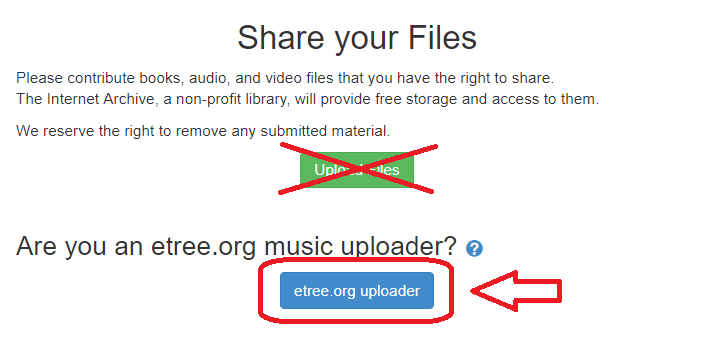
1. Log in and click the "Upload" button in the upper right corner.

2. On the next page, click the blue "etree.org uploader" button.
3. Creating the item identifier (the last part of your item's unique web address.)
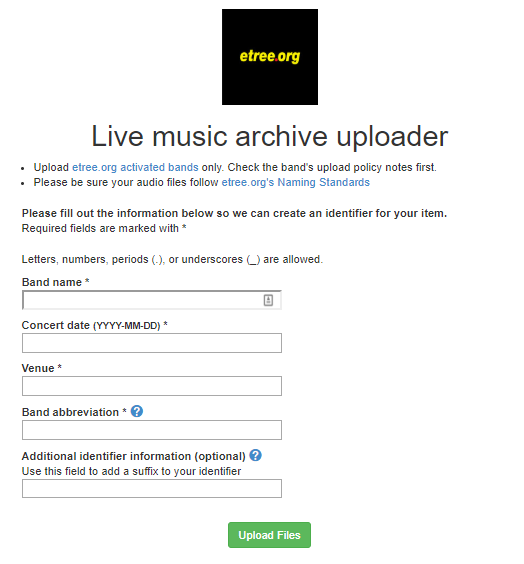
1. Band name: Start typing the band name and the system will find the match in the list of etree approved bands. Select the band from the list of matches. You may only type part of the band's name until you get a match that can be selected.
2. Concert date (YYYY-MM-DD): The date MUST be entered in YYYY-MM-DD format. For example, 2007-08-05 for August 5, 2007.
3. Venue: Enter the name of the venue for the concert.
4. Band abbreviation: Use the abbreviation for the band. The uploader will populate the most commonly used abbreviation based on the artist you choose in the "Band name" field. You can choose the preselected one (if available) or type your own. See full list of band abbreviations.
5. Additional identifier information (optional): Sometimes it is useful to add other information about the item to differentiate it from other recordings of the same show - microphones use, bit depth (16 or 24), etc. Click on the blue ? mark next to the field label for more information.
When the fields contain the information for you upload, click on the green "Upload Files" button to proceed to the next step.
Tips:
• Do not use special characters (such as &) or spaces in the band abbreviation or Rest of identifier fields.
• You may get a "Please wait for the identifier to finish" message if the identifier requested is already in use or you use a character that is not allowed.
• You don't need to use periods as separators; the system will put them in for you. If you mistype something, an administrator can change it later. Just continue as normal, and email lma(AT)archive(DOT)org when you're done to have us fix it.
• If your identifier is not available, try adding some source information in the "Rest of identifier" field: instead of flac16, try aud.flac16 or akg483.flac16.
•Make sure you wait for the flashing circle to finish spinning after you type in a part of the identifier. Otherwise your identifier may end up incomplete.
4. On the next page you will upload your files.
The files you upload must include:
• Legal live audio files (lossless FLAC (.flac), Apple Lossless (.m4a) or Shorten (.shn) files ONLY.) WAV and AIFF files are allowed, but not preferred. It is the best to learn how to convert WAV and AIFF to FLAC format.
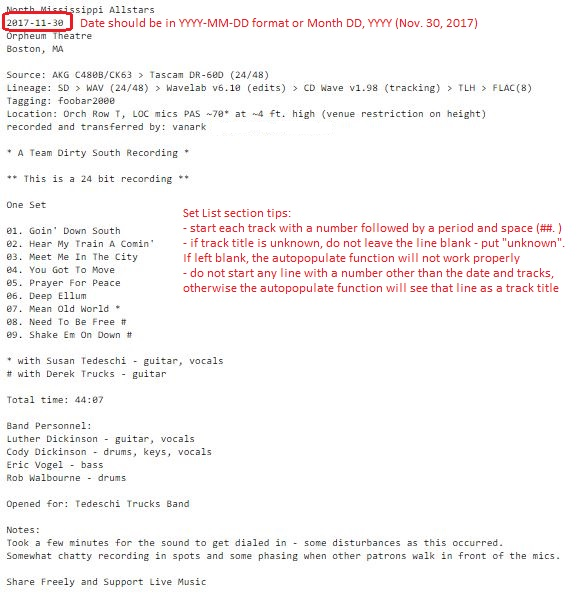
• An info file in plain text format (.txt files ONLY)
Note: MD5 and ffp checksum files are no longer required. Many prefer to include checksums in the upload for reference. The checksums will not be checked at any time, but FLAC file integrity is tested upon upload.
• Optional: Include an image file (such as a .jpg) with the uploaded files to display the image in the online music player.
Sample text file format with tips:
To upload:
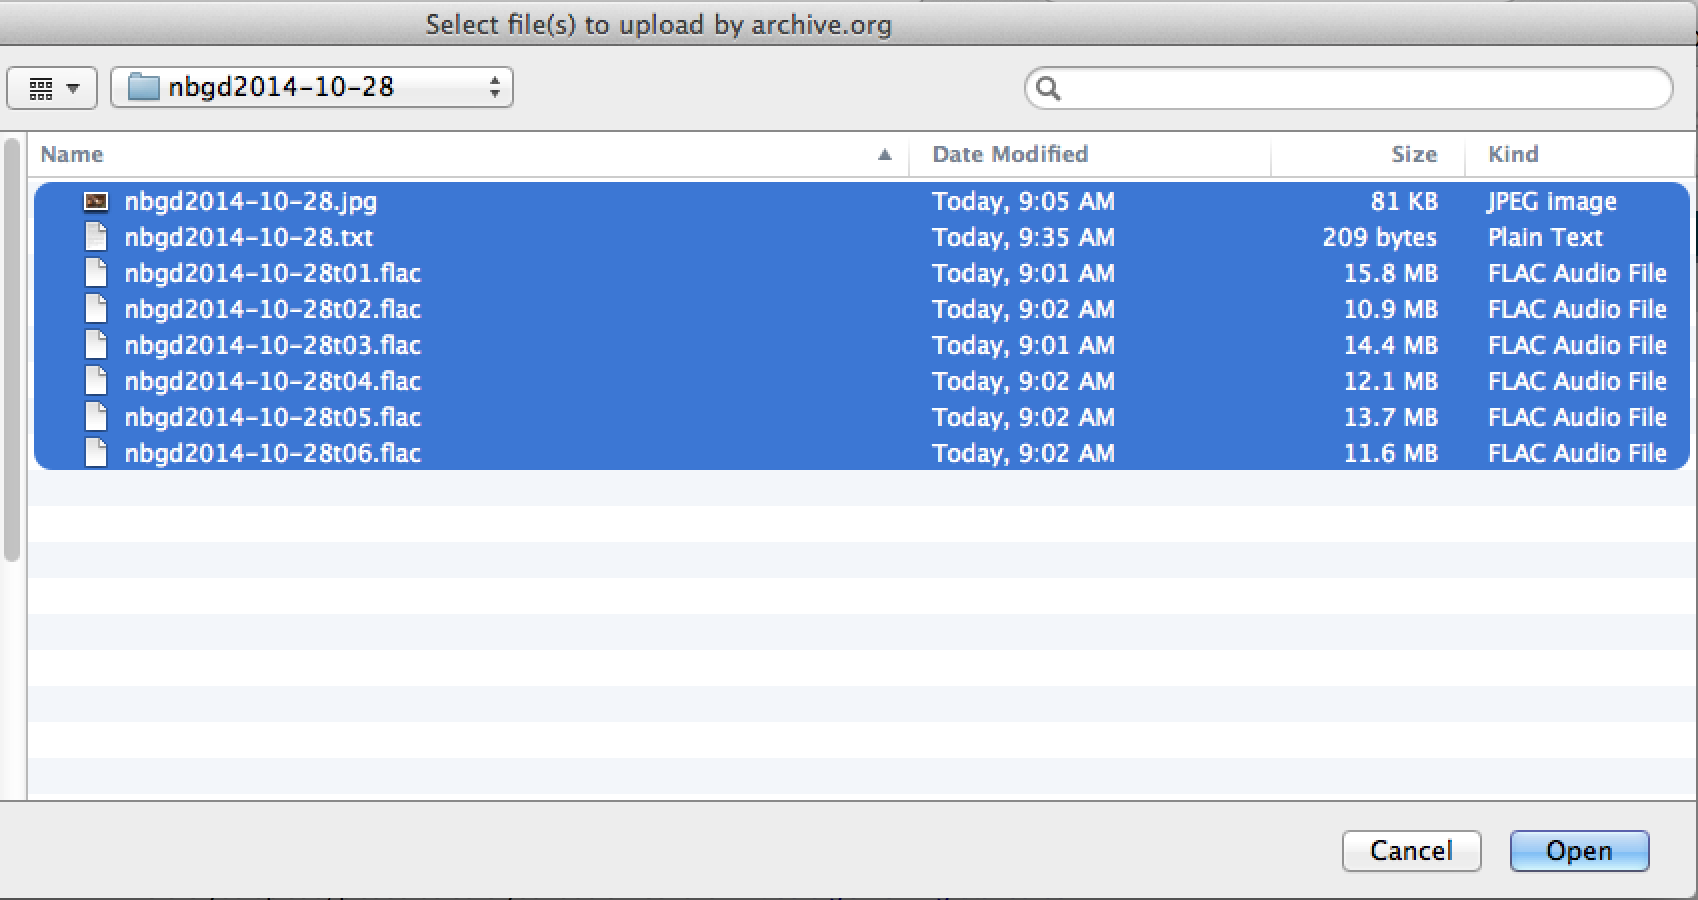
1. Click the "Choose files to upload" button or Drag and Drop your files onto the shaded area.
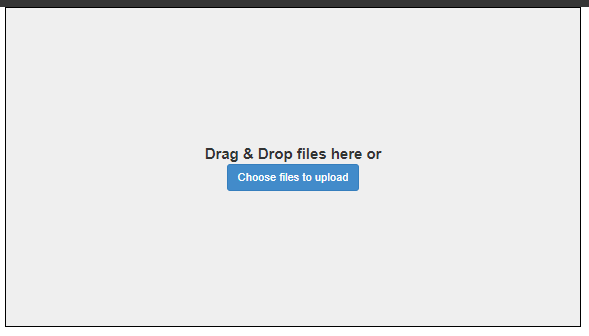
2. Select ALL the files you wish to upload and click the "Open" button or Drag & drop them onto the shaded area.
The upload process will proceed to the next screen where you will finish entering information about the item.
5. Completing the upload information.
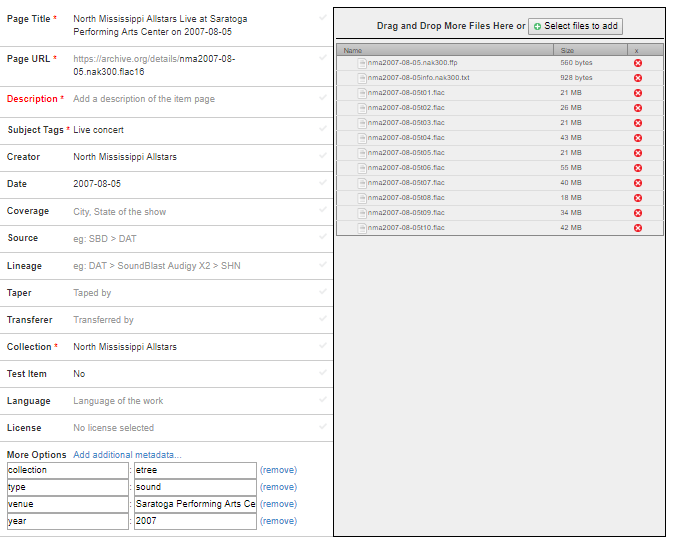
The Page Title, Page URL, Date, Venue, Collection, and Creator (aka Artist) are precompleted with information based on what was entered on the initial screen.
These are the only required fields but please fill out as much as you can. Here are the additional fields that are available:
• Description: Paste the setlist in here.
• Subject Tags: Enter any tags you want associated with the item. These tags allow for users to find items with the same tags simply by clicking on the tag.
• Date: Enter the date in YYYY-MM-DD format. (Autopopulated with date entered in Step 4.)
• Venue: Enter the name of the venue only.
• Coverage: Enter the city and state where the venue is located.
• Source: Enter the equipment used to record the show.
• Lineage: Enter the equipment used to transfer the master to FLAC/SHN format.
• Taper: Enter the name of the person who recorded the show.
• Transferred by: Enter the name of the person who transferred to FLAC/SHN.
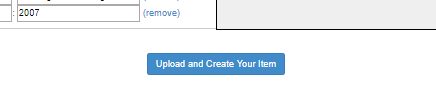
Once the information is completed, click on the blue "Upload and Create Your Item
" button to start uploading your files and complete the upload process.
You will then seen a file uploading progress bar:

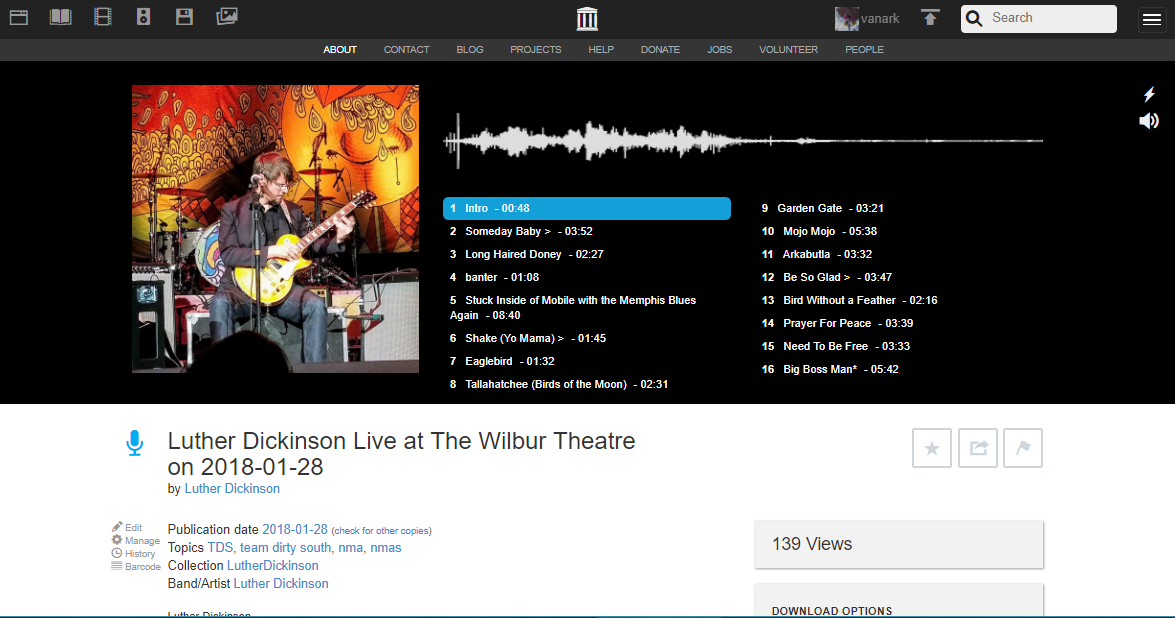
Once the file upload process is complete, the process proceeds directly to the item page.
6. The system will use all the information you typed in to create an item page with the recording into the artist's collection.
Tip: If you allowed derivatives and they have not shown up after a few hours, there may be a problem with your fileset. If the files fail the FLAC integrity check, your show's 'derive' task (the process that checks the integrity of the files and if they pass, then makes the mp3's and oggs) will fail. It will show as a 'redrowed' task in the show's 'History' page. You can access the item history by clicking History under the microphone icon on the left side of the screen.
If your task fails and you cannot figure out how to fix it, simply drop the administrators a line (lma(AT)archive(DOT)org) and we will help you fix the problem. You do NOT need to re-upload the entire fileset again. Most problems can be fixed with just re-uploading one file or some simple fix. Please send any questions about this or recommendations for improvement to lma(AT)archive(DOT)org.
Thanks for your upload! Keep the live recordings coming and tell your favorite band about the Live Music Archive project and ask them if they would grant their permission to be included in the LMA.